 Sashimii
Notes and Directions
Leave notes on words or ranges, tag them with what should happen there, and hand them to your agent through the agent queue.
A note marks a stretch of the recording and says something about it: a reminder for yourself, a question about a cut, or a direction for your agent, like “put these three words on screen”.
Add a Note
Select words in the transcript (or a range on the timeline) and press N, or choose Add Note… in the popover above the selection.
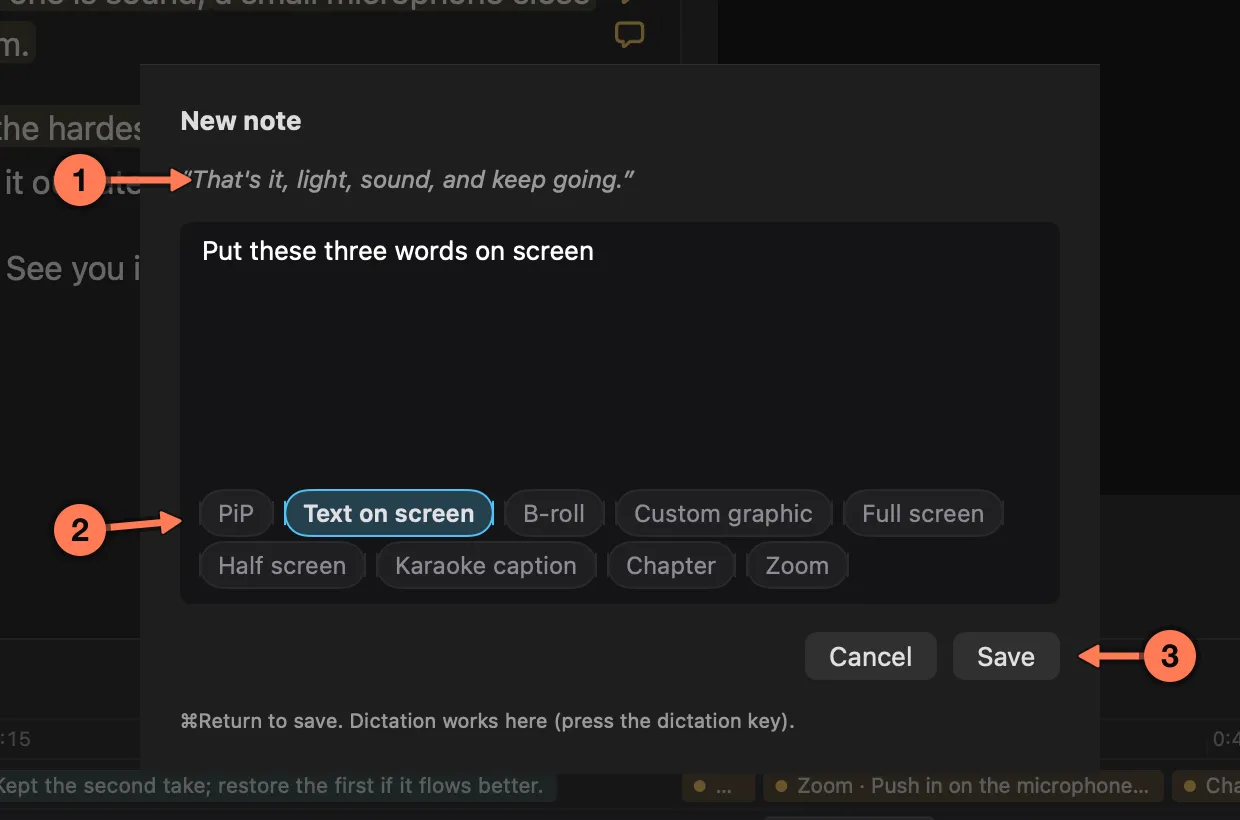
- The words the note is on. Type the note in the box below them; dictation works there too.
- Tags say what the note asks for. Pick as many as apply, or none for a plain note.
- Save (⌘ Return).
| Tag | Asks for |
|---|---|
| PiP | The video small, in a corner, over something else |
| Text on screen | Words on screen |
| B-roll | Other footage over this part |
| Custom graphic | A graphic you describe |
| Full screen | A graphic that fills the frame |
| Half screen | A graphic beside you, taking half the frame |
| Karaoke caption | Captions that follow the words as they are said |
| Chapter | A YouTube chapter starting here; the note’s first line is its title. See YouTube Chapters. |
| Zoom | A push in on the video |
Tags describe the request; whoever answers the note, usually your agent, chooses how to make it.
Who Wrote It
Colour shows the author: gold for your notes, teal for your agent’s. The same colour is on the tint over the note’s words, its bubble in the transcript’s margin, its pin on the timeline and its row in the Notes column. Editing a note keeps its author.
The Notes Column
Click Notes in the toolbar, or choose View › Notes (⌃ ⌘ I).
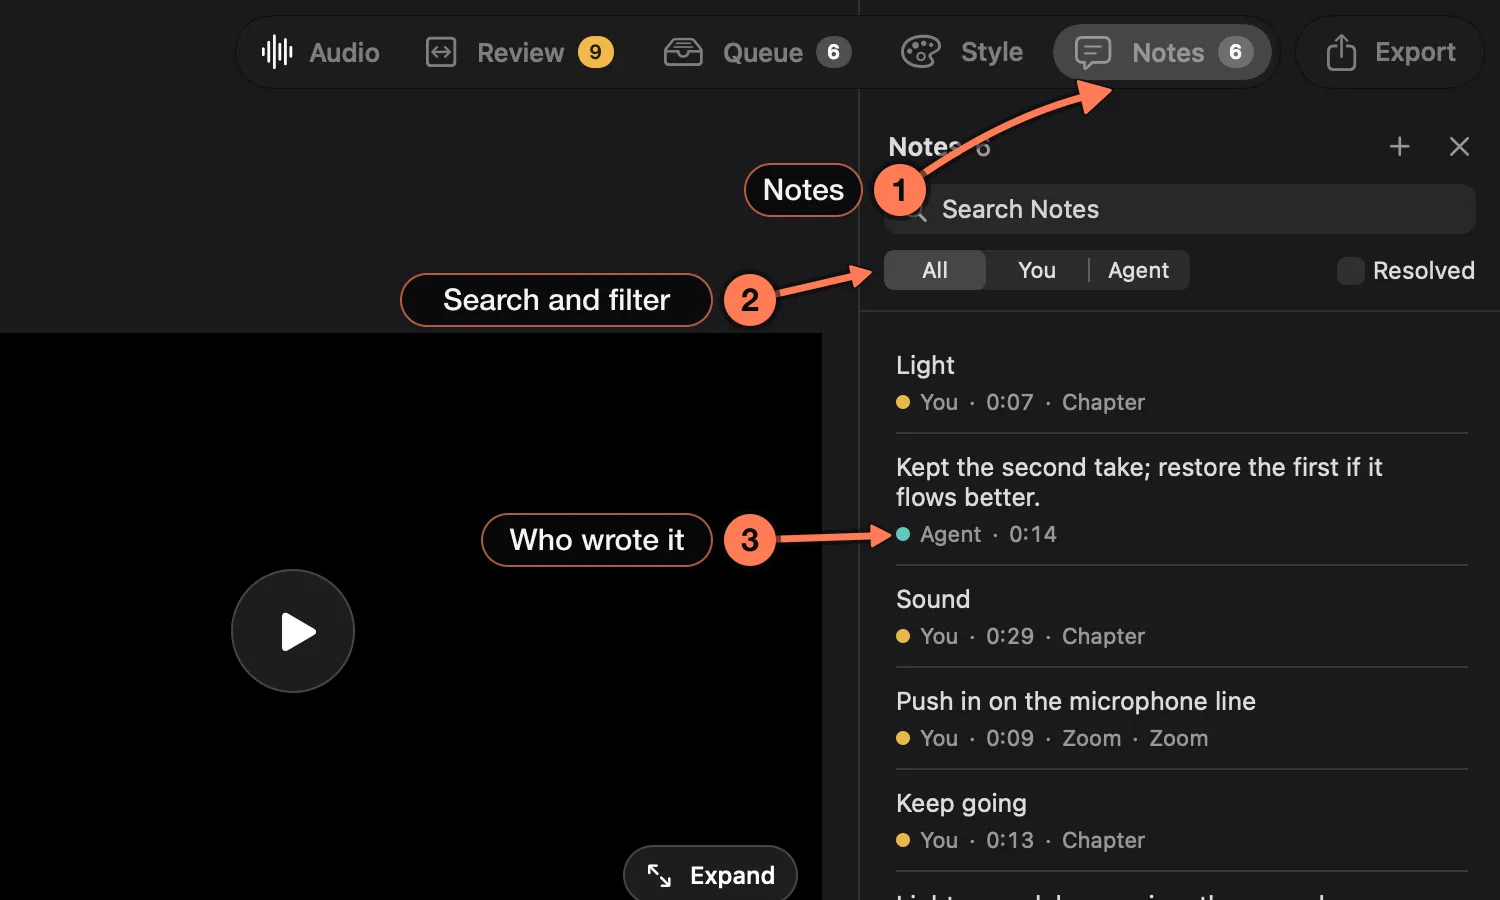
- Notes shows and hides the column.
- Search and filter. Search the text, show All, only You or only Agent, and tick Resolved to include notes that have been dealt with.
- Each note with who wrote it, its time and its tag. Choose a row to jump to the note; double-click it to edit.
Hand Notes to Your Agent
Queue in the toolbar lists everything waiting for your agent: open notes, and graphics waiting for a retime.
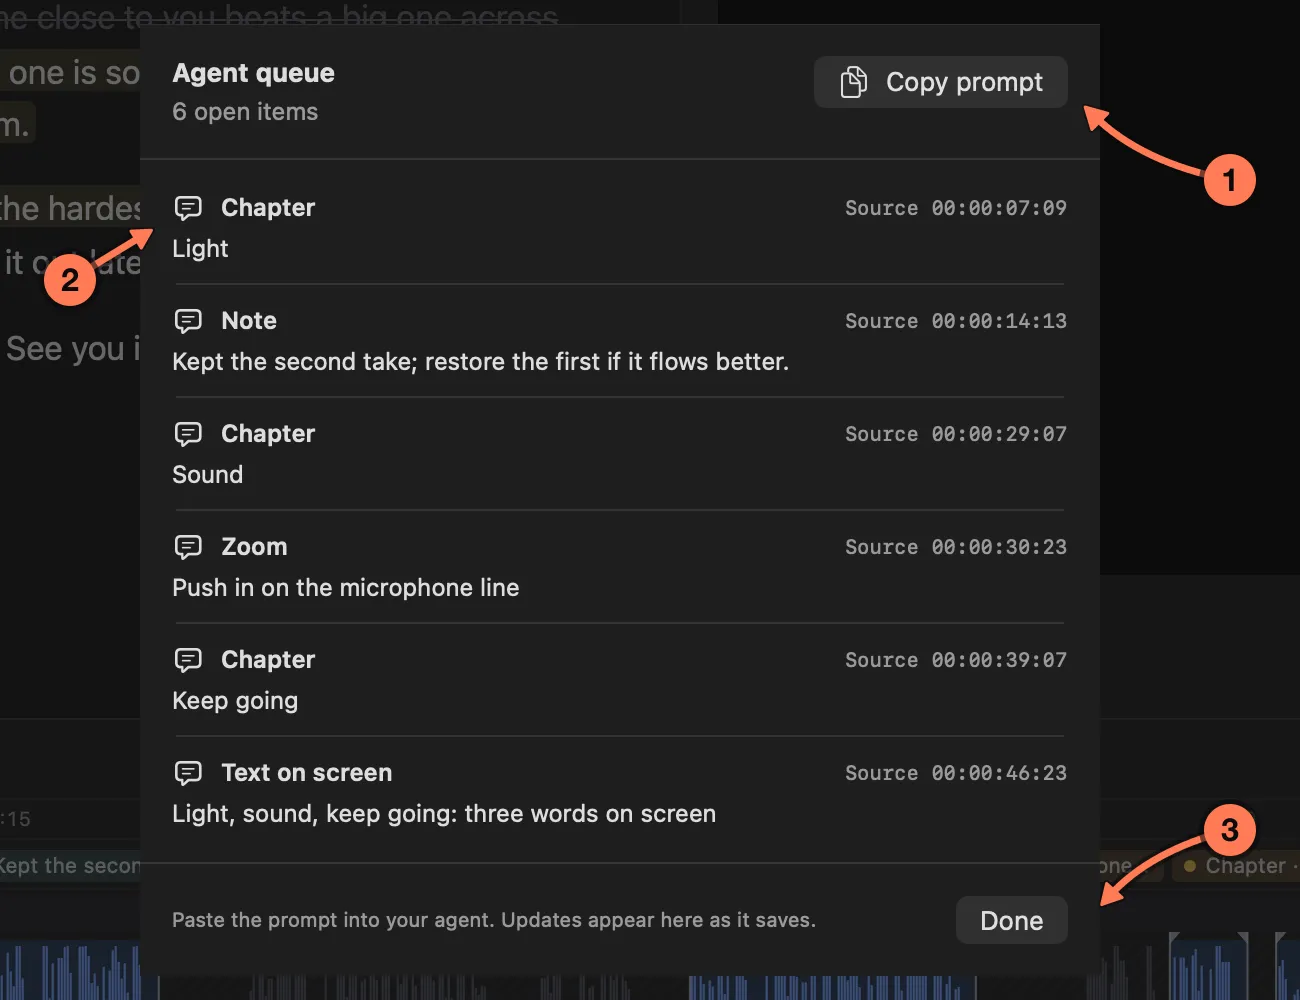
- Copy prompt copies the open items, with instructions, to paste into your agent. Or just tell your agent
check Sashimii: your open notes show up there too. - The open items, with their time in the recording. Click one to show it on the timeline.
- Done closes the queue. It updates while you work.
When your agent has handled a note, the note leaves the transcript and the timeline. To send it back, right-click it in the Notes column and choose Reopen.